Linking to other pages

When you add a link to a page, you can link to a page in your Omni CMS website, or
to an external web page.
When linking to a page or file on our website, pick the page using the file chooser,
rather than pasting in the URL. This way, dependency manager keeps track of your link
and keeps it from breaking if the page is moved or renamed.
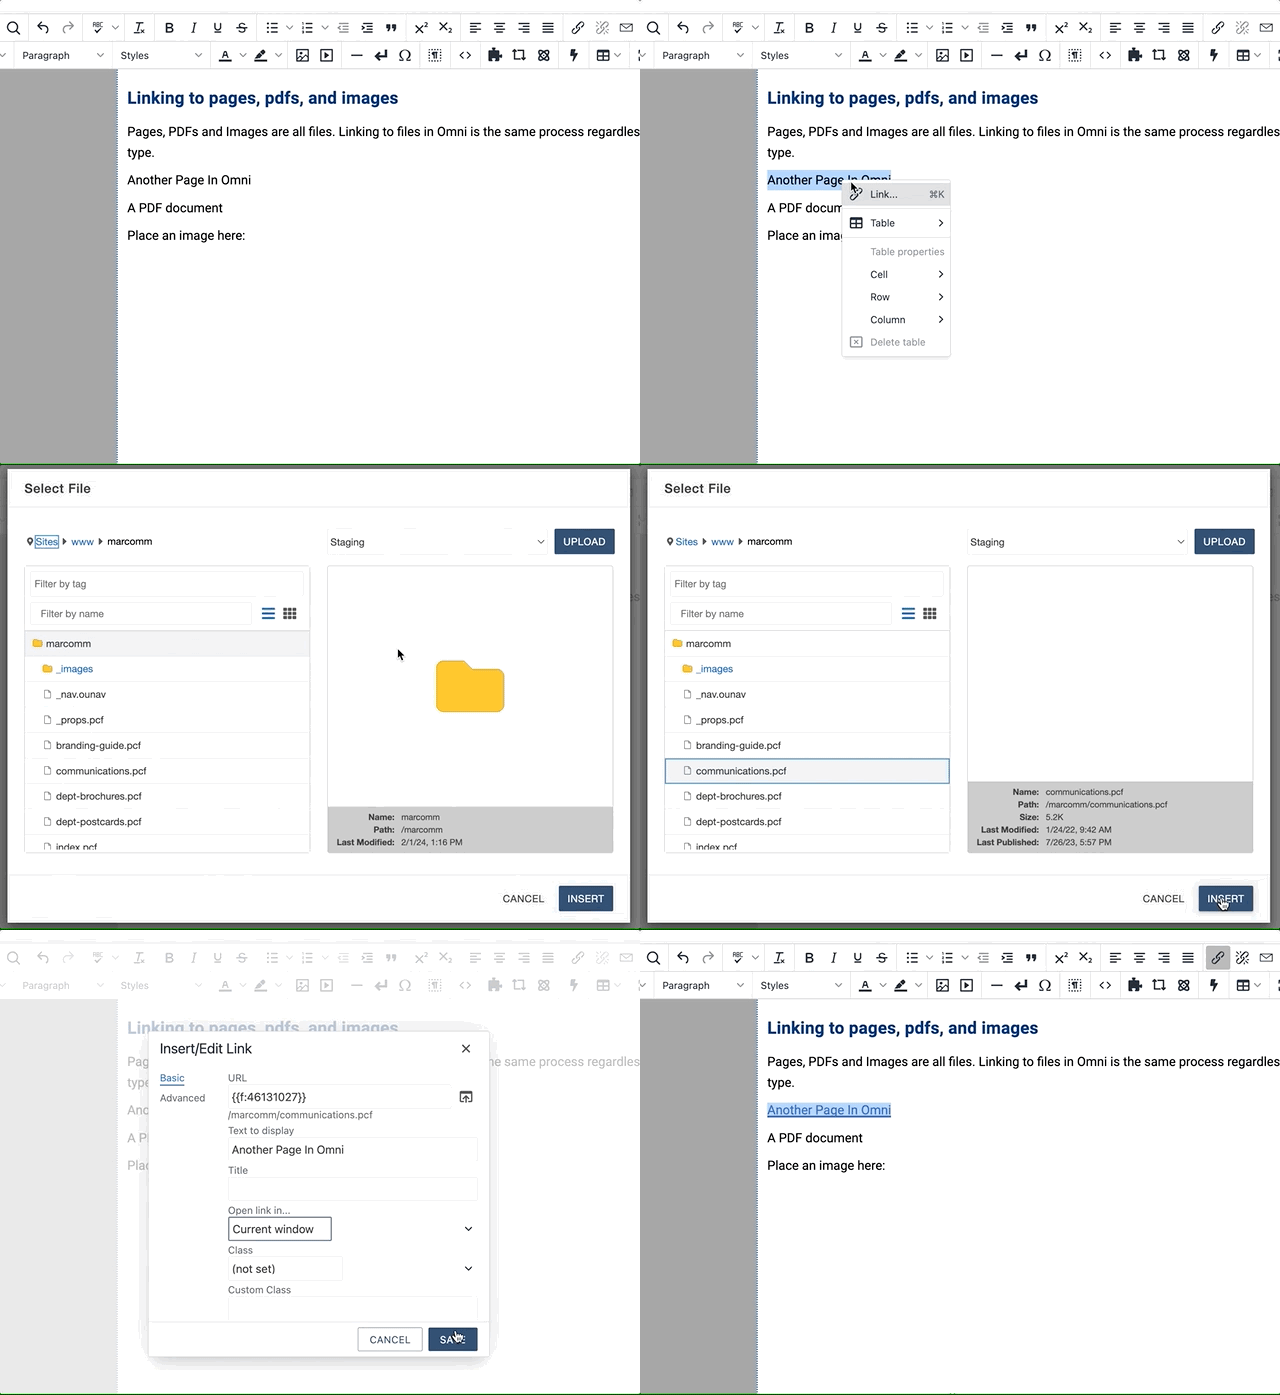
- While editing an editable region, select the text to link or create new text and highlight
it. Link real language, don't write out the url on the page. (Admissions not untdallas.edu/admissions)
- On the toolbar, click the "Insert/Edit Link" tool (outlined in red in the above graphic).
- In the "Insert/Edit Link" window, click the "Browse" icon
to the right of the url field.
- From the file chooser, pick the .pcf page you want to link to. You can navigate through
the folders by using the breadcrumbs at the top. Click "Insert" when done.
- To link to an external web page, paste the full address into the field (must include
https://) and choose Open Link in New window.
- The "Title" field is the text that appears when someone hovers over the link.
Document Linking
Convert all document types to PDF before uploading, this ensures users without Microsoft
software can view them.
Filenames must follow the naming convention. Omni CMS will allow you to change the name of a file during the upload process, but
its easier to do it ahead of time.
- Only lowercase letters and numerals allowed
- No spaces allowed. Use hyphens or underscores
- Must end in a file extension
Uploading while editing a page
- While editing an editable region, create a link as in the above steps.
- In the "Insert/Edit" box , check the file chooser for your dedicated "docs" or "files"
folder if you have one. If you dont, you should be in /sites/default/files/ by default.
- In the "Insert/Edit" box, Click Upload in the top right corner.
- In the "Upload" box, click +Add to browse or drag files from your computer to the "Upload" box.
- Files to be uploaded appear in a list. You can remove files or rename them. Files
that need to be renamed are highlighted. Use the [...] icon to the right.
- After renaming, you must click in some empty space to confirm your new name. The red
text will disappear if your name is accepted.
- Click Start Upload.
- Click Insert.
- Save and Publish the page for it appear on your live website.